Searching “basement finishing Ottawa” usually means one thing: a homeowner is ready to turn unused square footage into real, functional living space. Whether the goal is a family room, home office, guest suite, gym, or multi-zone basement, understanding the full construction timeline is critical before starting.
For homeowners in Kanata, Orléans ON, Nepean, Vanier, and Gloucester ON, basement finishing is one of the most valuable renovations available. It increases usable space without changing the home’s footprint. But basement renovations are multi-stage construction projects, not simple cosmetic updates.
This guide walks through the complete start-to-finish basement finishing timeline, focusing on the three major construction phases:
- Framing
- Drywall
- Finishes
Along the way, it explains planning, sequencing, inspections, and common delays so Ottawa homeowners know exactly what to expect.
No competitor mentions. No repetitive filler. Just a structured, realistic breakdown of how basement finishing actually happens.
Why Understanding the Timeline Matters
Many basement renovation problems happen because homeowners underestimate sequencing. Basement finishing is not just installing drywall and paint. It involves:
- Structural planning
- Layout confirmation
- Moisture awareness
- Framing precision
- Multi-coat drywall finishing
- Trim and final detailing
- Cleanup and final review
In Kanata, Orléans ON, and Nepean, many homes were built with unfinished basements designed for future development. In Vanier and Gloucester ON, older basements may require additional preparation before framing begins.
Knowing the timeline prevents frustration and helps homeowners plan around daily life disruptions.
Phase 0: Pre-Construction Planning (1–3 Weeks Before Work Begins)
Before any framing begins, proper planning must occur.
1. On-Site Evaluation
This includes reviewing:
- Furnace and mechanical placement
- Water heater location
- Electrical panel access
- Plumbing stack positions
- Support posts and beams
- Ceiling bulkheads
- Window locations
- Stair placement
In Kanata, basements often have wide open layouts but include centralized mechanical zones. In Vanier and Gloucester ON, mechanical placement can be more irregular and ceiling heights may vary.
2. Layout Confirmation
Homeowners should confirm:
- Room zones
- Wall placement
- Storage area
- Utility room location
- Door swing direction
- Clear pathways
In Orléans ON, Nepean, and Kanata, zoning often includes a family room plus office or bedroom.
Proper layout prevents awkward hallways and unusable corners.
3. Permit Consideration (If Required)
Depending on scope, permits may be needed, especially when:
- Adding bedrooms
- Altering structure
- Modifying certain systems
Confirming this before framing prevents delays.
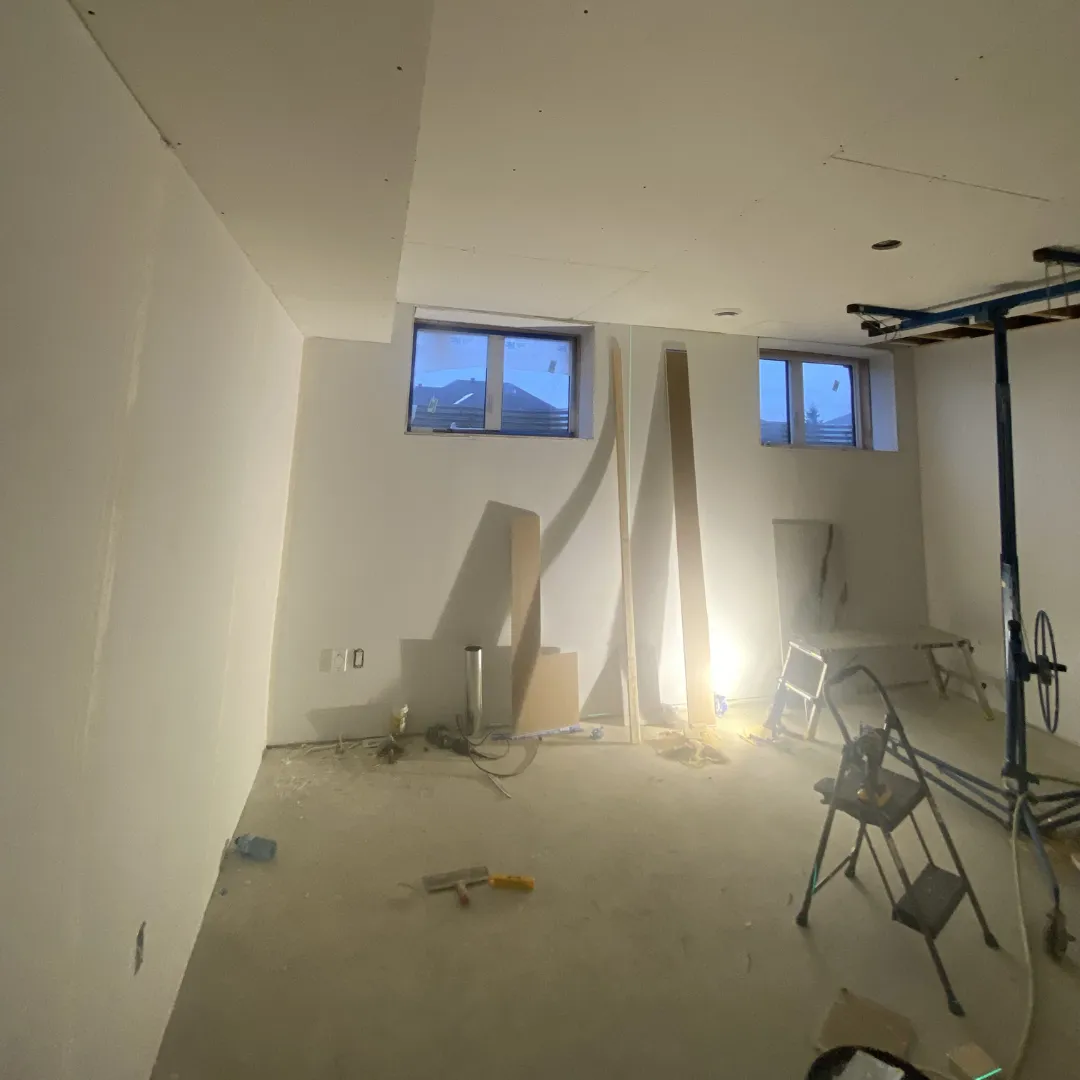
Phase 1: Basement Framing (Typically 1–2 Weeks)
Framing is the structural skeleton of the finished basement. Everything that follows depends on framing accuracy.
Step 1: Layout Marking (1–2 Days)
Walls are marked on the floor according to the approved layout.
Key considerations:
- Alignment with beams
- Clearance around mechanical systems
- Door openings
- Future drywall seam planning
This stage is critical. Small framing errors can cause crooked drywall lines and door alignment problems later.
Step 2: Wall Framing Installation (3–7 Days)
Walls are constructed using lumber and secured to floor and ceiling joists.
Important framing details:
- Walls positioned slightly off foundation walls for moisture management
- Reinforcement where needed
- Straight and plumb alignment
- Blocking added for future drywall and fixture support
In Kanata, Orléans ON, and Nepean, framing often defines open family rooms and offices. In Vanier and Gloucester ON, framing may require correction of uneven floors or older structural quirks.
Precision during this phase determines final quality.
Step 3: Bulkhead and Ceiling Framing (2–4 Days)
Bulkheads are framed around ducts and plumbing lines.
Ceiling framing must:
- Maintain consistent height
- Avoid excessive drops
- Align cleanly with wall framing
Poor bulkhead planning is one of the most common basement finishing mistakes in Ottawa.
Step 4: Framing Inspection (If Required)
If permits are involved, framing may need inspection before drywall begins.
This ensures:
- Structural compliance
- Proper spacing
- Safe layout execution
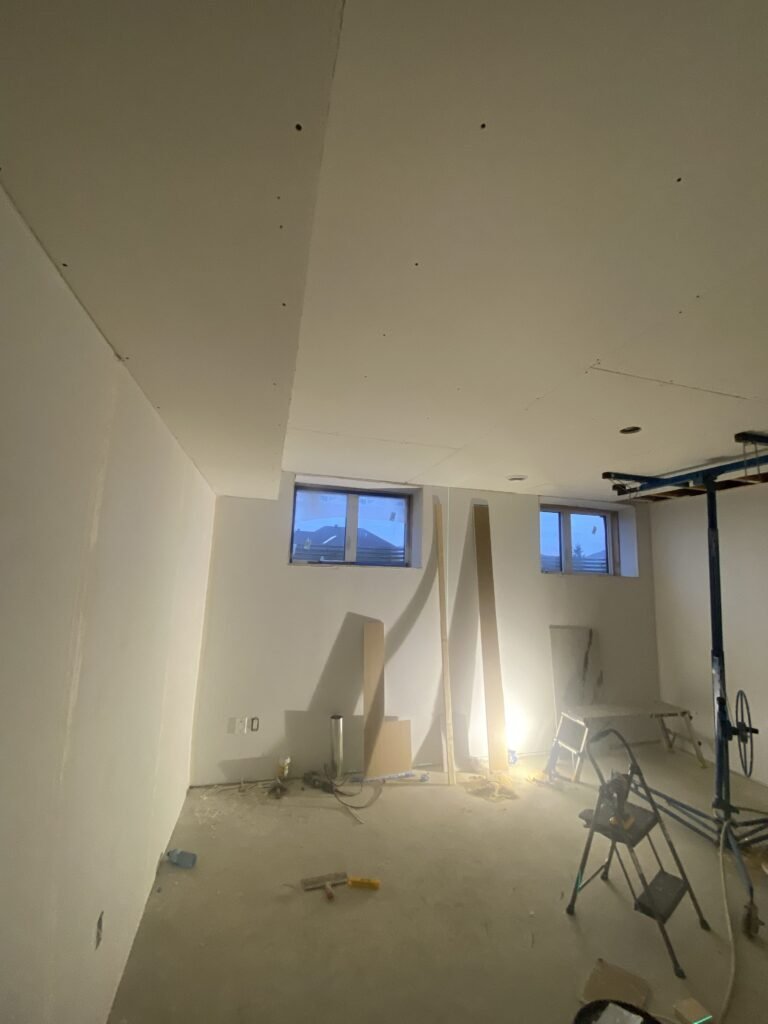
Phase 2: Drywall Installation (Typically 1–2 Weeks)
Drywall transforms framing into visible rooms. This phase requires precision and patience.
Step 1: Drywall Hanging (3–5 Days)
Drywall sheets are measured, cut, and secured to walls and ceilings.
Key considerations:
- Tight seam alignment
- Proper fastening spacing
- Clean cuts around outlets and fixtures
- Minimizing seam placement in visible areas
In Kanata and Nepean, large open basement spaces require careful drywall planning to avoid visible seam patterns. In Vanier and Gloucester ON, uneven framing may require correction before drywall installation.
Step 2: First Coat (Taping and Mudding) (2–3 Days)
Seams are taped and coated with compound.
This stage sets the foundation for smooth finishes.
Step 3: Second and Third Coats (3–5 Days)
Multiple coats are applied to:
- Feather seams
- Smooth transitions
- Reinforce corners
Drywall finishing requires drying time between coats. Rushing this phase results in visible imperfections.
In Orléans ON, Kanata, and Nepean, lighting often highlights drywall flaws. High finishing standards matter.
Step 4: Sanding and Final Smoothing (2–3 Days)
Sanding prepares walls for paint.
Dust control during this phase is important, especially in occupied homes across Orléans ON, Vanier, Gloucester ON, Nepean, and Kanata.
Clean sanding ensures paint-ready surfaces.
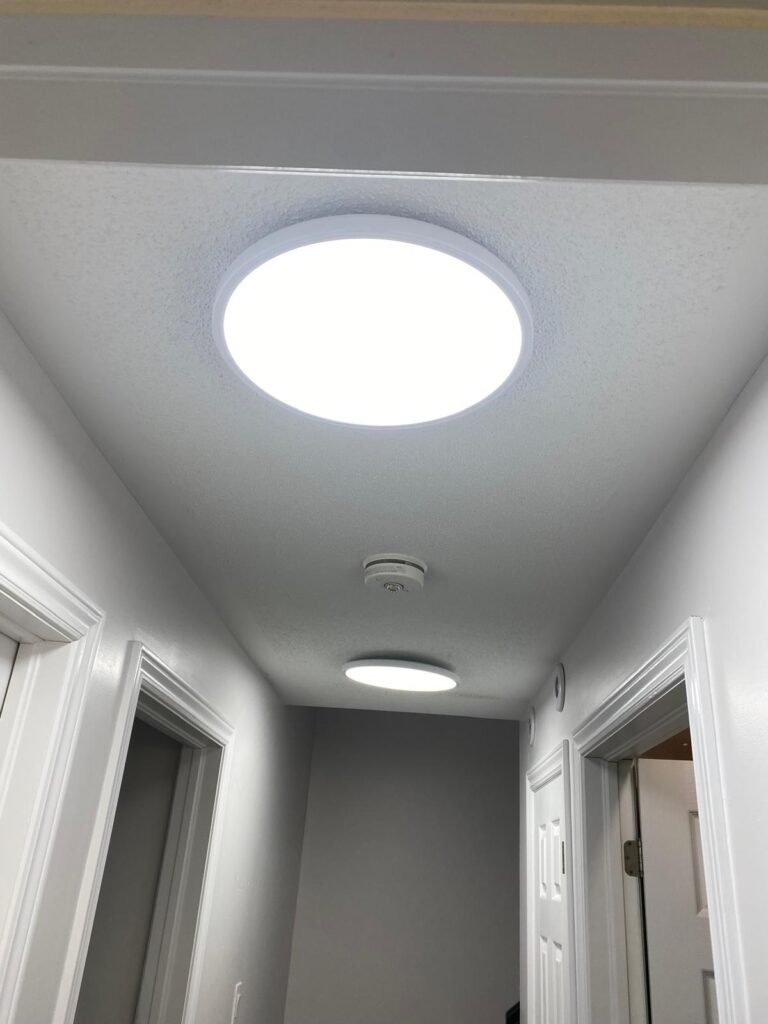
Phase 3: Finishing Stage (Typically 1–3 Weeks)
After drywall is complete, finishing transforms the basement into livable space.
Step 1: Priming and Painting (3–5 Days)
Primer seals drywall.
Paint is applied in multiple coats.
Color choices impact light reflection in basements. In Ottawa, lighter tones are often preferred due to lower natural light.
Step 2: Trim Installation (3–5 Days)
Trim includes:
- Baseboards
- Door casings
- Window trim
- Stair trim
Trim defines finishing quality.
In Kanata, Orléans ON, and Nepean, clean trim lines elevate basement spaces significantly. In Vanier and Gloucester ON, trim upgrades often modernize older homes.
Step 3: Door Installation (2–3 Days)
Doors are installed and aligned.
Door alignment depends heavily on framing precision.
Step 4: Flooring Installation (3–7 Days)
Flooring depends on material choice.
Basement flooring must consider:
- Moisture
- Durability
- Comfort
In Ottawa basements, durable and moisture-aware flooring is critical.
Step 5: Final Touches and Hardware (2–4 Days)
Final touches include:
- Hardware installation
- Minor touch-ups
- Final caulking
- Inspection of drywall seams
- Cleanup
Attention to detail during this phase determines whether the basement feels professional or rushed.
Total Basement Finishing Timeline in Ottawa
On average:
- Planning: 1–3 weeks
- Framing: 1–2 weeks
- Drywall: 1–2 weeks
- Finishes: 2–3 weeks
Total typical timeline: 4–8 weeks
Timeline depends on:
- Basement size
- Complexity
- Layout changes
- Drying time
- Material selection
- Inspection scheduling
In Kanata, Orléans ON, and Nepean, scheduling can be busier in peak seasons.
Common Timeline Delays in Ottawa Basement Finishing
Understanding delays helps homeowners plan.
Common causes include:
- Late material selection
- Unexpected framing corrections
- Drywall drying delays
- Permit inspections
- Bulkhead adjustments
- Moisture issues discovered late
In older neighborhoods like Vanier and Gloucester ON, hidden structural irregularities may extend timelines.
How to Keep a Basement Finishing Project on Schedule
Homeowners in Kanata, Orléans ON, Nepean, Vanier, and Gloucester ON can keep projects moving by:
- Finalizing layout before framing
- Selecting finishes early
- Allowing drying time
- Avoiding mid-project scope changes
- Planning for temporary noise and dust
Clarity prevents disruption.
Why Framing Quality Determines Everything
Basement finishing quality starts with framing.
If framing is:
- Straight
- Reinforced
- Plumb
- Well-planned
Then drywall and trim will look clean.
If framing is rushed, drywall seams show and doors misalign.
This is true in every neighborhood across Ottawa.
Why Drywall Finishing Is the Most Visible Quality Signal
Drywall finishing determines:
- Smoothness under lighting
- Seam visibility
- Corner durability
- Paint quality
In open basement layouts in Kanata and Nepean, drywall quality is immediately visible.
In smaller basements in Vanier and Gloucester ON, drywall detail matters even more.
Final Thoughts: Basement Finishing Is a Structured Process, Not a Quick Upgrade
Basement finishing in Kanata, Orléans ON, Nepean, Vanier, and Gloucester ON is one of the smartest ways to add usable living space.
But it must follow a clear timeline:
- Careful planning
- Accurate framing
- Patient drywall finishing
- Detail-oriented final finishes
When each phase is respected and sequenced properly, the finished basement feels like a natural extension of the home—not an afterthought.
Understanding the start-to-finish timeline allows homeowners to plan realistically, reduce stress, and achieve results that look clean, functional, and built to last.